For DIY enthusiasts, few projects offer the thrill of creating your very own high-performance RC car from the ground up. By constructing it yourself rather than buying a ready-to-run kit, you gain complete control to customize each component for your exact racing needs. From machining your own chassis pieces to selecting the perfect gear ratios and electronics, the entire build process will teach you invaluable skills in fabrication, electronics, and mechanics. In this comprehensive guide, you’ll learn step-by-step how to Build an RC Car from Scratch. You’ll gain practical knowledge on everything from chassis design to suspension geometry as you bring your custom RC car vision to life.
What is an RC Car and Why Build One Yourself?
An RC (remote control) car is a miniature vehicle that is guided by a handheld transmitter. Building an RC car from scratch is an enjoyable hobby project that lets you learn about mechanics, electronics, and racing. By assembling your own car you can choose the parts you want and end up with a custom vehicle tuned to your specifications. It’s very rewarding to build something using your own hands and skills and then be able to race it or just drive it for fun. Constructing your own RC car will teach you skills like basic metal and plastic fabrication, soldering, gearing, suspension setup, and troubleshooting.
Overview of the Project
In this project you’ll be fabricating the chassis from scratch, installing all the electronics like the motor, servo and radio gear, assembling the drivetrain and suspension parts, and finally testing and tuning the finished RC car. We’ll cover everything from cutting the chassis plates to connecting the wiring and controls. Once completed, you’ll have the satisfaction of creating your own high performance RC car that you can modify and upgrade over time. The process will give you hands-on experience with automotive design principles and electronic systems. Building your own RC car takes time, care and patience, but it’s an incredibly rewarding hobby that provides endless enjoyment as you race and improve on your own creation.
Materials Needed to Build an RC Car
1. Chassis Pieces
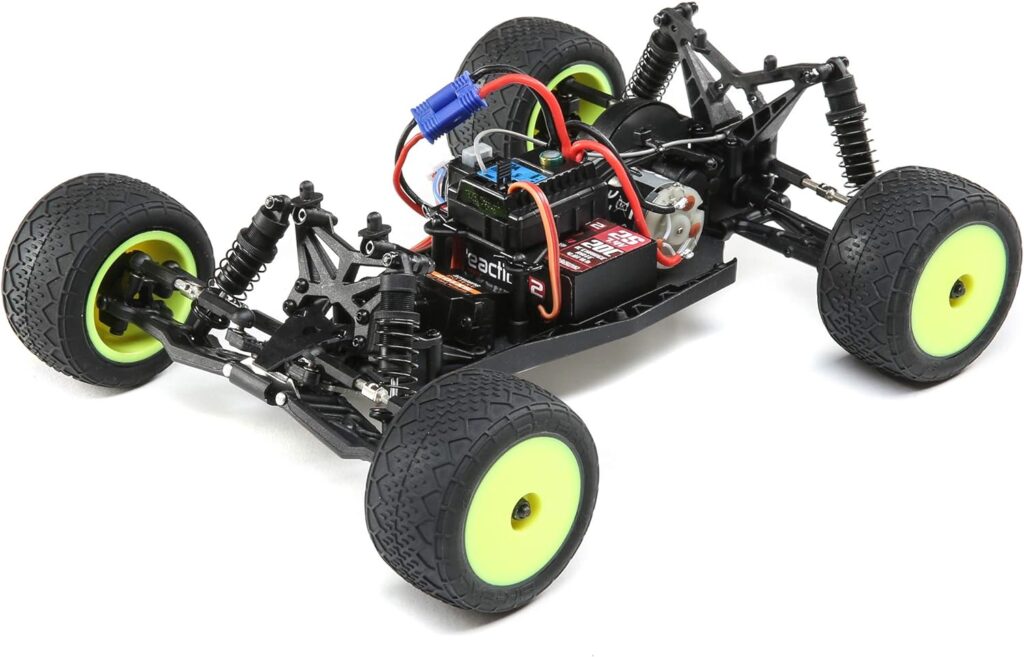
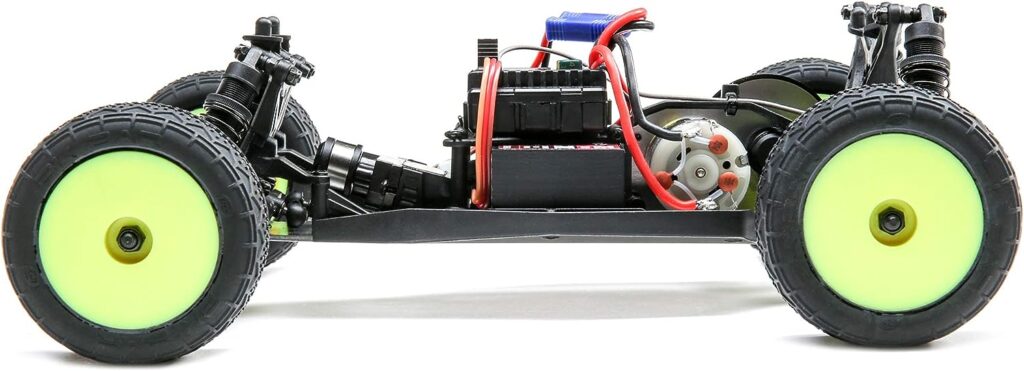
The chassis provides the main framework and structure of the RC car. You can fabricate it from various materials such as fiberglass, carbon fiber, plastic or aluminum. Carbon fiber offers an excellent strength-to-weight ratio. Fiberglass is cheaper but heavier. Plastic like ABS can be easy to cut and work with. Consider the performance goals and budget when selecting chassis material. Also purchase the necessary sheets, tubes or channels and hardware to assemble the chassis pieces into a 4-wheel platform.
2. Wheels and Tires
Wheels support and position the tires, absorbing impacts and providing a balance of acceleration, braking and cornering. Many options exist for wheel diameter, width and offset. Tires provide all of the grip, so consider the tread pattern and rubber compound needed for your expected driving surface (track, on-road, off-road, etc.). Wheels and tires are available pre-mounted, or you can select separate components.
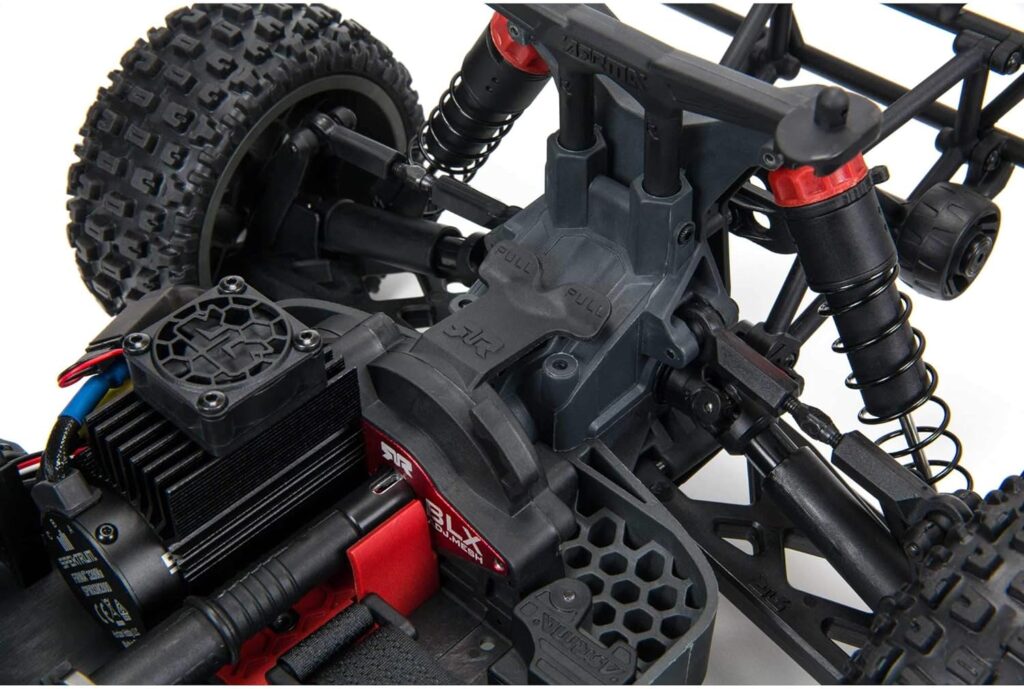
3. Motor and Electronic Speed Control (ESC)
The motor provides power, while the ESC controls delivery of that power to the wheels. Brushed motors are inexpensive and easy to use, while brushless motors offer more efficiency and speed but are more complex. The ESC converts the DC power from the battery into 3-phase AC for the motor. It also allows throttle control from the radio. Match your motor Kv rating to the battery voltage for optimal performance.
4. Radio Transmitter and Receiver
The radio system is what gives you remote control over the car. The transmitter is handheld, while the receiver is mounted on the car. Look for at least 4 channels (steering, throttle, reverse, brakes) and digital 2.4GHz for reliability. The receiver connects to the ESC and servo to relay signals.
5. Steering Servo
The steering servo actuates the front wheels to turn the car left or right. Look for a metal-geared servo with torque rating suited to the chassis and wheels. The servo links to the receiver and mounts on the chassis near the front wheels.
6. Battery and Charger
The battery provides power to the electronic speed control and servo. Look for a Lithium Polymer (LiPo) battery with at least 20C discharge rating. A 2S or 3S battery in 5000-7000mAh range should suffice. Get a compatible LiPo charger that can safely balance-charge your battery.
7. Miscellaneous Hardware
You’ll need various screws, nuts, wires, connectors, cable ties and more to assemble the chassis, mount components, and connect the electronics. Assortments with multiple sizes are convenient to have on hand.
List of the Best Unassembled RC Car Kits


Assembling the Chassis
1. Cutting and Joining Chassis Pieces
Once you have your chassis materials selected, you can start fabrication by measuring and cutting the sheets, tubes and plates to the required dimensions. Use tools like a ruler, marker, cutting mat, hobby knife, and/or power saw to cut precision pieces. The chassis will likely involve joining plastic or metal parts together via screws, adhesive, welding or rivets. Take care to ensure a strong and square assembly.
2. Attaching Axle Holders and Mounting Points
The axle holders allow installation of the wheel axles and suspension arms. Use the drilled holes or mounting brackets on the chassis to properly attach the axle holders perpendicular to the chassis at the front and rear. This establishes the wheelbase. You may also need to attach motor, electronics and body mounts to the chassis at this stage. Use screws or brackets to firmly secure all mounting points.
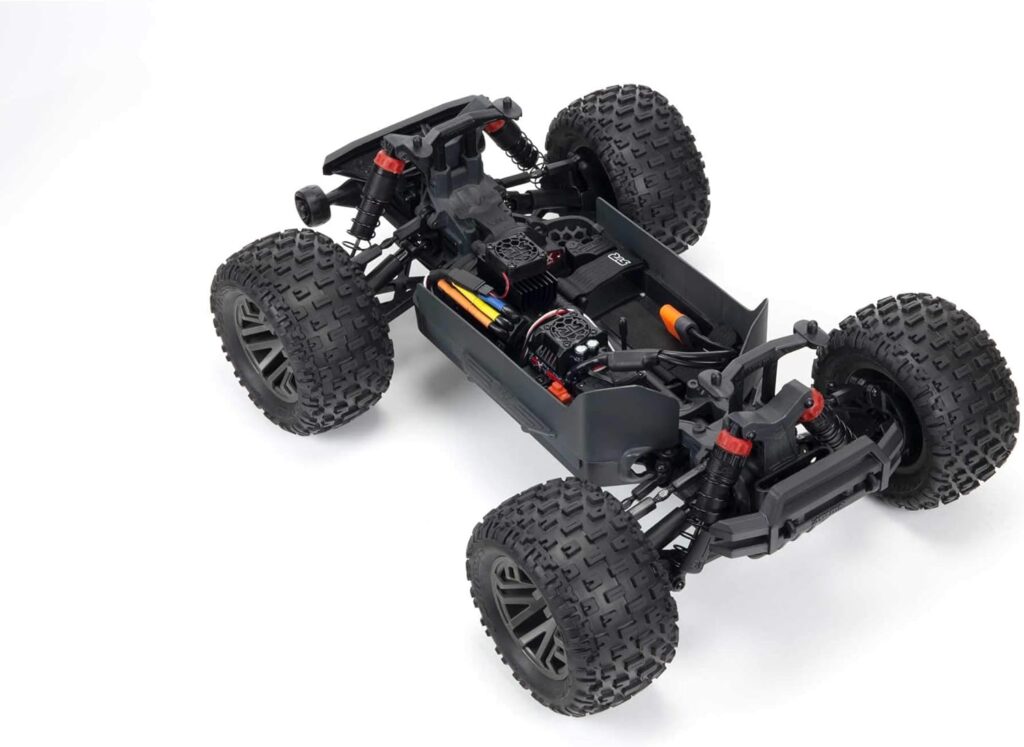
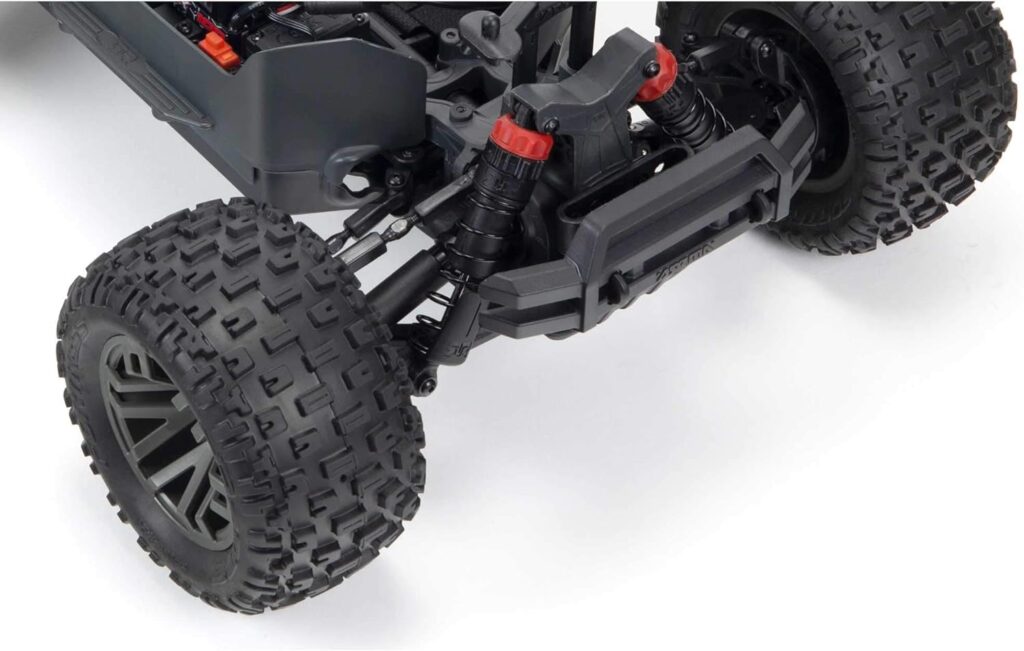
3. Installing the Suspension and Shocks
The suspension enables the wheels to move vertically and maintain contact with the driving surface. Begin installing the suspension arms, pivots and shock absorbers. Adjust the arm angles and mounting positions to achieve proper suspension geometry for the desired handling. Linkages connect the steering servo to the front wheels. Adjust the suspension settings like camber, caster, toe and anti-squat to tune performance.
4. Adding Wheels and Tires
With the axle holders and suspension installed, you can mount the wheels and tires. Slide the wheel hubs or axles through the suspension arms and secure using suspension pins or E-clips. Choose front and rear tires for appropriate traction and desired handling balance. Inflate the tires to optimal pressure for the conditions. Install foam inserts if using airless tires.
Installing the Electronics
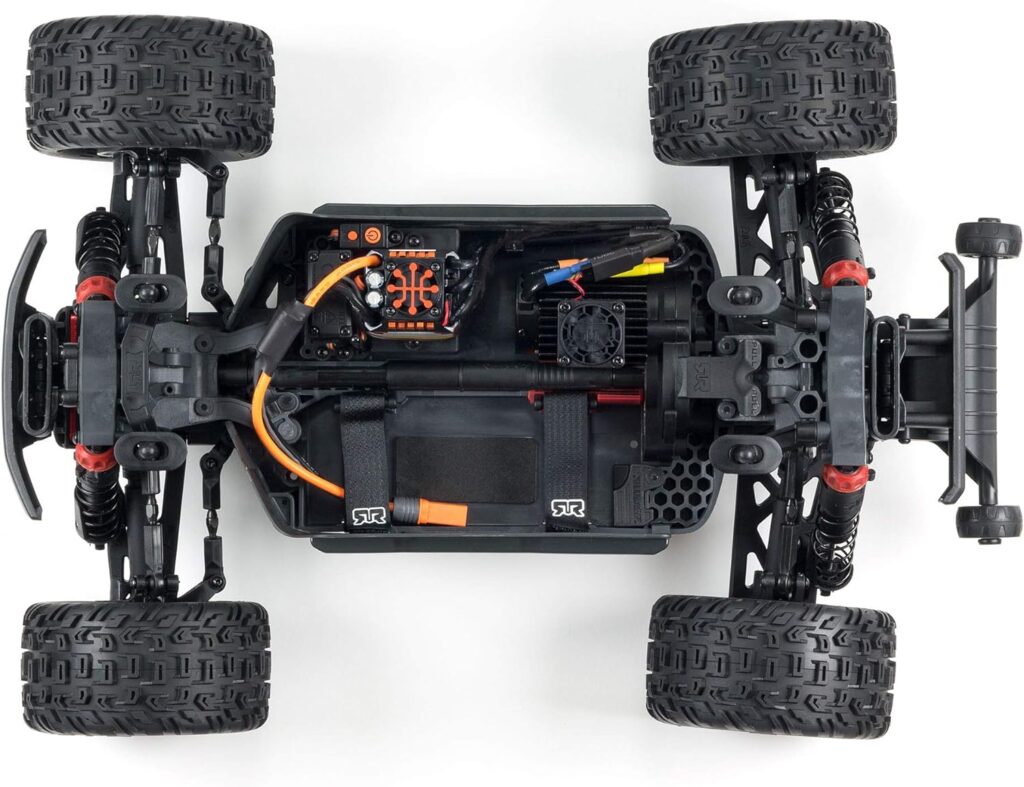
1. Wiring up Speed Control, Receiver, Battery and Motor
Now it’s time to wire up all the electronics. First mount the motor to the chassis per the design. Then connect the battery to the speed control using the power wires. Run the three-phase output wires from the speed control to the motor. Connect the throttle control and power wires between the receiver and speed control. Use heat shrink tubing over all solder joints. Follow the wiring diagram to ensure proper connections.
2. Mounting the Servo and Connecting Steering Linkages
The steering servo actuates the front wheels to turn the car. Mount the servo to the chassis or servo mount using the included hardware. Then connect the servo PWM control wire to the receiver. Fabricate a servo arm and linkage to connect the servo to the steering mechanism on the front wheels. This transfers servo rotation to steer the car. Verify sufficient clearance and minimal slop.
3. Binding Transmitter and Receiver
For the radio system to operate, the transmitter and receiver must be electronically paired or bound. This is accomplished using a binding plug and designated bind button on the receiver and transmitter. Follow the manual process to put the receiver in bind mode. Once bound, the receiver will only respond to signals from your transmitter. Remove the bind plug once complete.
Now the electronic components are fully installed. Carefully check that all wiring is correct and secure before applying power. Also verify the transmitter controls and steering are functional before the initial power-on.
Testing and Troubleshooting
1. Initial Power Up Tests
With assembly complete, it’s time to test the electronics and controls. First, check that the transmitter is on and the battery is fully charged. Power on the receiver and ESC, checking for proper LED status lights. Inspect for any loose wiring connections or shorts. Then operate the throttle gradually to ensure the wheels spin as expected without any odd sounds. Test steering left and right to verify proper servo function.
2. Checking Steering and Throttle Response
Taxi the vehicle slowly back and forth while operating the steering and throttle. The controls should be smooth and proportional at both low and high speed. The steering must not be overly sensitive or delayed. Verify the servo reach and linkage geometry provide sufficient steering angle. Adjust the ESC programming for braking and reverse as needed. Make small tweaks to the throttle and steering limit settings and exponential on the transmitter.
3. Remedying Issues
You’ll likely experience some initial bugs or problems. Check for loose screws, worn wires, binding links and poor connections that may cause glitches. Suspension arm angles can cause binding. Look for radio glitches that could indicate poor antenna placement or damaged wiring. Review the build process and operating manuals to identify and rectify any issues. Thoroughly troubleshoot problems before attempting full speed testing.
Proper bench testing is critical before operating the car at full speed. Make adjustments and repairs as needed until all controls operate flawlessly at low speed. This helps minimize risk of failure when running it full throttle. Your patience will be rewarded with a smoothly operating car.
Customizing Your RC Car
1. Painting or Decaling the Body Shell
A unique paint job or cool graphics on the body shell can really make your RC car stand out. Carefully disassemble the shell from the chassis. Clean and sand the outer surface to prepare it for painting. Mask off any areas like windows you don’t want painted. Apply several light coats of spray paint using even motions. Consider a bright primary color with a contrasting accent color on the edges. You can also customize the look using decals and stickers for graphics and designs. Finish it off with a clear coat for gloss and protection.
2. Adjusting Gearing for More Speed or Torque
You can adjust the gear ratio by changing the pinion spur gears to modify power delivery. Installing a smaller pinion or larger spur gear provides more torque and acceleration. A larger pinion or smaller spur gear yields higher top speed. Switch between different gear combinations to find the optimal ratio for your preferences and the driving conditions.
3. Upgrading Motor, Servo or Battery
As you improve your RC driving skills, you may want to upgrade components for even higher performance. Installing a more powerful brushless motor can increase speed substantially. A faster steering servo with stronger torque provides quicker response. Higher capacity and discharge (C rating) LiPo batteries offer longer runtime and the ability to handle higher power draws. Just ensure all upgrades are compatible to avoid damage.
The customizations and tuning options are nearly endless when building an RC car from scratch. Experiment with different settings and hardware to get the car handling how you want for your driving style and surfaces. It’s fun to incrementally improve the performance and appearance of your creation.
Driving and Maintaining Your RC Car
1. Safely Operating Your New RC Car
Now it’s time to safely drive your newly built RC car! Find an open area away from traffic to run the car at higher speeds. Always turn on the transmitter before the receiver so the failsafe is active. Start slowly and work up to higher speeds once you gain confidence. Check controls at various speeds and with quick direction changes. Keep full throttle runs in a straight line and practice cornering at moderate speed. Stop immediately if you notice any odd handling behavior.
2. Charging and Storing the Battery
Carefully follow battery charging instructions to avoid damage or fire. Allow time for the battery to cool after use before charging. Fully discharge LiPo batteries before storage to prevent swelling or capacity loss. Store the battery at around 50% charge in a fireproof bag or container. Avoid puncturing the battery or short circuiting the contacts.
3. Periodic Inspection and Repairs
Closely inspect your RC car before and after each driving session. Look for any loose or damaged parts so you can repair promptly. Expect faster wear of tires and some suspension components over time. Test the steering and drivetrain under power to check for developing issues. Recharge the battery fully before storing. Keep the electronics clean and dry. By performing periodic maintenance and repairs, you’ll keep your custom RC car in great running order.
Enjoy the pride and excitement of driving your fully custom RC car model! Share your knowledge to help others who want to experience the same hands-on learning process and satisfaction. With the right care and maintenance, your creation will provide many hours of racing excitement and tinkering.
Frequently Asked Questions about How to Build an RC Car from Scratch
Q: What tools do I need to build an RC car from scratch?
A: The basic tools you’ll need are hobby knives, screwdrivers, pliers, wrenches, a soldering iron, wire cutters, and basic hand power tools like a drill or rotary tool. Useful specialty tools include a chassis jig, wheel balancer, gear puller, and shock oil. Investing in good quality tools will make construction easier.
Q: What skills are required to build an RC car?
A: Key skills include the ability to follow wiring diagrams, solder electronic components, operate hand tools and power tools, assemble mechanical parts, and perform basic fabrication with metal, plastic or wood. Learning the fundamentals of automotive design and suspension geometry is also very helpful knowledge.
Q: What is the best material for a scratch built RC car chassis?
A: Carbon fiber and fiberglass sheets provide excellent strength-to-weight ratios. Aluminum can also be used but requires more fabrication experience. Plastics like ABS are easier to work with but not as durable. The chassis material affects the car’s overall performance and cost.
Q: How much does it cost to build an RC car from scratch?
A: The cost can range anywhere from $200 up to $2000 or more depending on the parts used. Lower cost builds utilize basic electronic components and plastic chassis materials. Higher budgets allow exotic materials like carbon fiber and professional grade electronics. Most DIY builds fall in the $500 to $1000 range.
Q: What electronic components are required?
A: At minimum you need a brushless motor, electronic speed control, steering servo, radio receiver, transmitter, battery and charger. More advanced builds add telemetry and other electronics. Carefully choose parts that are compatible and meet your vehicle’s power needs.
Q: How long does an RC car build take for beginners?
A: For those new to building, expect the process to take at least 20-40 hours from start to finish. Much of this time will be spent fabricating the chassis, troubleshooting any issues with the electronics, and repeatedly tweaking the car. Patience is required when building your first RC car.
Q: What tips help the build go more smoothly?
A: Follow instructions precisely, keep build notes, take photos at each stage, properly organize hardware, perform quality checks at each step, test components before installing, and be prepared to problem solve issues. Rushing through the build will likely cause headaches later.
Final Thoughts
Building an RC car from scratch is an incredibly rewarding and educational hobby that opens up a whole new world of tinkering creativity. By walking through the full process from fabricating the chassis to customizing the electronics and suspension, you gain invaluable hands-on experience and satisfaction. While it requires patience and diligence, the end result is your own high performance RC car that you can race, upgrade, and repair. The skills you learn for designing, troubleshooting, and tuning will carry over to future projects. With this guide, you now have the essential steps and knowledge to begin your exciting journey into building fully custom RC cars.
Enjoyed this guide of How to Build an RC Car from Scratch? Then be sure to check out our other RC Rating guides.