The DJI Mini 3 Pro has quickly become one of the most popular and portable drone options for aerial photography. At the heart of the easy, intuitive flying experience is the Mini 3 Pro’s remote controller. While this compact controller comes with a built-in rechargeable battery, knowing how to properly charge it is key to maximizing performance. In this guide, we’ll cover everything you need to know about charging your DJI Mini 3 Pro remote controller. From checking battery levels to using the correct cables and chargers, we’ll outline proper charging techniques and provide tips to safely charge up the battery so your controller is always ready for flight. Whether you’re a new user looking to understand the basics or a seasoned pilot wanting a helpful refresher, this guide will walk through the complete charging process step-by-step. So read on to learn the ins and outs of powering up your Mini 3 Pro’s remote controller for smooth, uninterrupted flying sessions.
1. Introduction
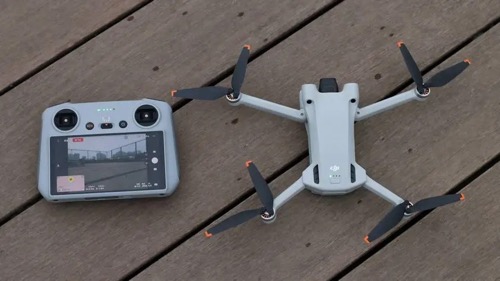
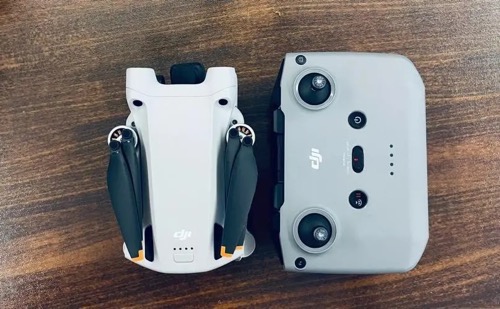
Features of DJI Mini 3 Pro RC controller
The DJI Mini 3 Pro remote controller has several great features that make it easy to control the drone. It has a built-in battery that can be charged directly through a USB-C port, eliminating the need for AA batteries. The controller uses enhanced Wi-Fi transmission for a max control range of up to 12km. It also has a bright, crisp display that shows key information like battery levels, signal strength, and more. The ergonomic design fits nicely in your hands and has customizable buttons for mapping shortcuts as needed. Overall, the Mini 3 Pro controller has an intuitive, user-friendly design perfect for effortlessly controlling the drone.
Charging methods
There are a couple different ways to charge the DJI Mini 3 Pro remote controller. The most straightforward method is by using a USB-C cable and connect it directly to either a wall charger, power bank, or computer to charge. This allows you to top up the battery conveniently whenever needed. You can also charge the controller by placing it directly onto thedrone’s included two-way charging hub accessory. This hub connects via micro-USB to the drone and then magnetically attaches the controller to charge it. This option lets you charge both the drone and controller simultaneously for maximum convenience. Either way, charging the Mini 3 Pro controller is quick and hassle-free.
2. Preparing to Charge
Checking battery level of controller
Before charging the DJI Mini 3 Pro remote controller, you’ll want to check the current battery level so you know how much it needs to be charged. Press the power button on the controller and observe the battery icon in the top-right corner of the screen. The battery percentage will be displayed. You can also check the battery level via the DJI Fly app by going to the remote controller section. It’s best to charge the controller when it drops below 50% to ensure you have enough juice during your drone flight. Checking the level beforehand lets you know the charging time required.
Having charging cable and adapter ready
Make sure you have the USB-C charging cable and a compatible wall adapter or power bank ready before charging the remote controller. The controller comes with a USB-C cable in the box which you can use with a wall charger that provides enough power delivery of around 10W or higher. You can also use a power bank preferably with 10W output via USB-C. Having the cable and charger handy ensures the controller can easily be charged anywhere without hassle. Regularly inspect the cable for damage and replace if needed. Using the proper charging accessories prevents issues and enables convenient charging of the controller.
3. Starting to Charge
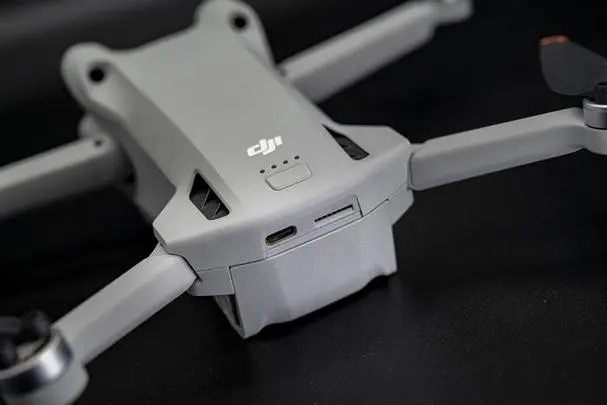
Connecting one end of charging cable to controller
To start charging the DJI Mini 3 Pro remote controller, first take the USB-C cable and plug one end into the charging port on top of the controller. This port has a rubber cover that can be flipped open to access it. The charging port has an indented icon next to it indicating that is the proper spot to connect the cable. Push the USB-C cable firmly into the port until it clicks securely in place. Wiggle the cable a bit to ensure it is properly inserted to begin charging.
Connecting other end to power adapter
After connecting the USB-C cable to the controller, take the other end of the cable and plug it into the wall charger or power bank. Make sure to use the official DJI wall charger or a compatible third-party wall charger that provides at least 10W power delivery via USB-C. If using a power bank, it also needs USB-C PD support of 10W or higher. Insert the cable firmly into the charger’s USB-C port until it clicks into place.
Plugging adapter into power outlet
With the USB-C cable connected at both ends, take the wall charger and plug it directly into a wall outlet, or turn on the power bank if using that instead. The outlet used should ideally be close by where the controller will be charging. Make sure to use a surge protector outlet for safety. Charging will not begin until the adapter is plugged into a live power source.
Controller charging indicator light status
Once the controller begins charging, the status indicator light on top will turn red to signify it is charging. The red light will turn off when charging is complete. You can also check charging status via the DJI Fly app if connected to the controller. The app will display the current battery percentage. The light or app will indicate when charging has finished.
4. Charging Time
Takes around 1.5 hours to fully charge
Charging the DJI Mini 3 Pro remote controller battery from empty to full typically takes around 1.5 hours. This is based on using the official DJI wall charger or a compatible third-party USB-C PD wall charger or power bank that provides 10W power output. Charging times can vary slightly depending on other factors like age of the battery and temperature during charging. It’s best to use the original wall charger and cable when possible for optimal charging speed. Allowing the battery to discharge completely before charging can also extend the time needed to fully top up the battery. In most cases, you can expect roughly 1.5 hours for a full charge cycle from 0 to 100%. Keep an eye on the charging status lights or app to see when the battery reaches maximum capacity.
5. Charging Tips
Use original charger and cables
It is highly recommended to use the original DJI wall charger and USB-C cable when charging the Mini 3 Pro remote controller. The included DJI charger is optimized specifically for charging the controller battery safely and efficiently. Using a lower quality or incompatible charger could lead to slow charging, overheating, or even damage to the battery. The official cable is also designed for durability and fast charging speed. While you can use a third-party USB-C PD charger or cable, your best bet is sticking with the OEM DJI accessories for optimal performance.
Avoid overcharging
Be careful not to overcharge the remote controller battery. While the controller will stop charging automatically once full, it’s still best practice to unplug it once it reaches 100% charge. Do not leave the controller plugged in and charging for extended periods of time after it has been fully charged, as this can degrade the battery over time. Also avoid charging right after a flight while the battery is still warm, and don’t charge at temperatures exceeding 104°F or below 41°F. Overcharging can diminish battery capacity.
Well-ventilated and cool charging environment
Make sure to place the remote controller in a well-ventilated area when charging. Do not cover or wrap the controller, as it needs air flow to dissipate heat from charging. Avoid charging in direct sunlight or hot environments. The ideal charging temperature range is between 60-90°F. Charging in a hot environment can overheat the battery and lead to damage. Do not charge near flammable materials or liquids. Position away from heat vents as well. Ample air circulation is key for safe charging.
Final Thoughts
Keeping your DJI Mini 3 Pro remote controller properly charged is crucial for enjoyable and problem-free drone flights. By learning how to check the battery level, use the correct OEM charging accessories, and charge in a proper environment, you can ensure your controller’s battery remains in optimal health. While a full charge takes around 1.5 hours, the convenience of being able to top up the internal battery via USB-C makes keeping powered up quick and simple. Follow these charging guidelines and tips to maximize your controller’s battery lifespan. Always land your drone to swap batteries or recharge if the controller power runs low mid-flight. With a fully juiced up remote controller, you can enjoy complete confidence and control to capture amazing aerial shots and footage with your robust and nimble Mini 3 Pro drone.
Enjoyed this guide of How To Charge DJI Mini 3 Pro RC Controller? Then be sure to check out our other RC Rating guides.